The “Business Card Raytracer” in python, Part 1
This blogpost is a rework of my old post from medium.com. You can find the original post here
Intro
I read majestic Fabien Sanglard’s article about the “business card raytracer” a few years ago. These 1337 bytes of code would fit on a business card. They also create a “digital business card” — an image with the initials of the developer:

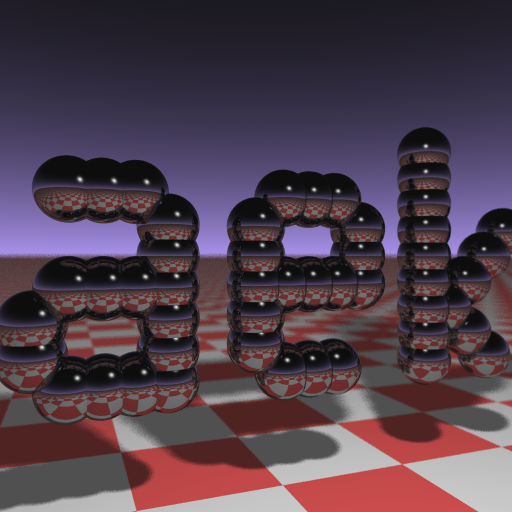
It is awe-inspiring to make any code that renders a 3D image, but this code does so much more. In less than 2K bytes, this code creates a properly ray-traced image with reflections, soft shadows, gradients, and more!
I didn’t know much about computer 3D graphics, so I decided to learn how this magical code works and experiment with it. Unfortunately, although I can read and hack into C++ code, I wasn’t comfortable enough reading C++ code while learning an entirely new complicated topic.
So, I decided to make a python version of this renderer. The code is now available on GitHub.

I made a python-only version of this code, rendering a different image (the python libraries are used, but no cython, as it would use an incompatible syntax). It works comparably fast with the weakly optimized C++ code. And even further, I implemented an animation that didn’t exist in the original code.
Here I will briefly tell a story of me porting the C++ code into python and making it work at a comparable speed. A story of how I implemented the animation can be found in part 2.
Attempt #1 - Copy-paste
Naive approach
The C++ code implements the idea of raycasting. As my first attempt to port it, I decided not to try to re-implement the idea of raycasting from scratch. Instead, I elected to simply re-write the C++ code into python with as few alterations as possible. The code was generally the same, except for a few changes:
- I gave all the variables like “c”, “l”, “h” human-readable names to make it easier for myself to understand the code,
- I adjusted the syntax and the definition of the variables from C++ to python. In particular, I replaced the vectors and vector operations with python tuples,
- Finally, for convenience, I added a conversion from the .ppm image files (used in the original code) to the .png image files.
A complete side-by-side comparison of the C++ code and the python code takes too much space, but you can find it in the appendix at the end of this page.
Speed considerations
There is a common belief that python is slow. We will address it below, but for now let me confess that when I ran my python code, I did not have the patience for it to finish. But while python itself may be slow, the python libraries are fast. So, I thought that I could resolve the speed issue using some C-based libraries.
First, I tried to use numpy vector algebra to transform the code into a vectorized form. But without a proper understanding of the C++ code at the earlier steps, I just couldn’t make it work correctly 😞 So, I had to give up on my vectorization ideas.
Luckily, there is a python library that lets me write the C-flavored python code and make it run almost at C-speed, which is exactly what I want. It is called numba, and I was familiar with it from my previous projects.
I added numba.jit wrapper around most of the functions to make my python code run at, supposedly, C-speed. As a result of this simplest alteration, my python code finished running! Rendering the image took about 43 seconds.
I didn’t like this speed, so I added one more trick, that changed the logic of the code. I reduced the number of rays per pixel. Original code casts and aggregates not 1 ray per pixel but 64 to make soft shadows and blur. I reduced this number to 8 rays per pixel, which allowed my python code to run on my laptop in ~5.5 seconds.
The moment of truth
Did the naive approach work? Well…
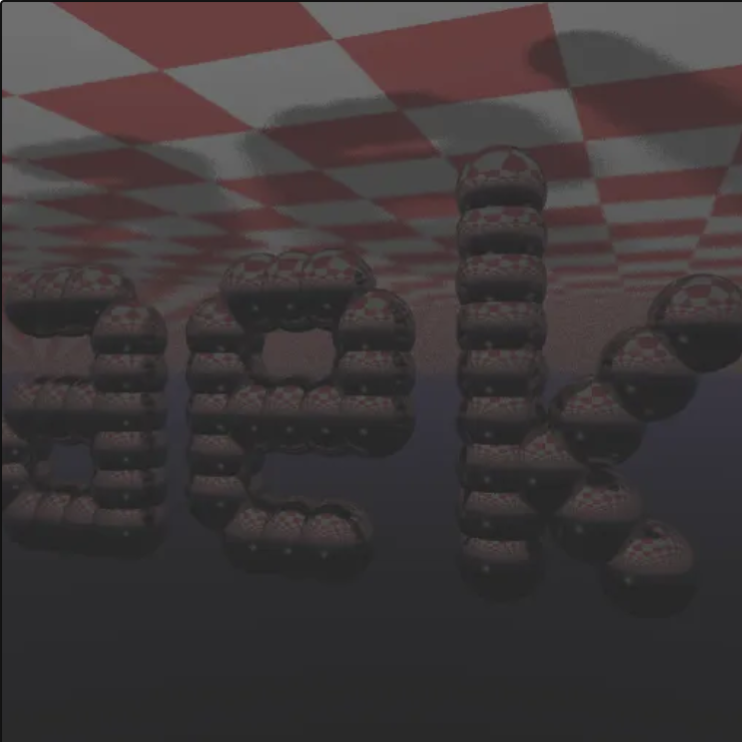

Second, turns out that I messed up something while “copy-pasting”, and the floor and the ceiling were flipped 😅 Also, the image was mirrored in general, and it was extra dark 😟
But first, it worked! I was quite happy (almost shocked, tbh) that I could implement in python a random math code I found on the internet, and it would work (more or less) on the first try 😲😄
Speed considerations - now with data
I assumed that the C++ code could render the image in a few milliseconds, so I got sad when my code took 43 seconds to run on my laptop.
Boy, I was wrong. The original C++ code without any optimizations takes 101 seconds to run on a modern computer (now it can run at 8 frames/s, thanks to Fabien’s exhaustive performance experiments described here).
So, funnily enough, while I was thinking that my naive python code runs slowly, it was in fact ~ 2.3x faster than C++ naive unoptimized code.
I’m not sure why exactly this happened. I guess numba had comparable performance to C++ from the start. And on top of that, it might have also applied some modern-day optimizations and performance improvements.
If you allow C++ too to optimize its code, as described by Fabien, the performance eventually becomes in favour of C++. Weakly optimized C++ code (produced by running compiled with -O1 flag) runs in 52.9 seconds, which is still slightly slower than the python code. But heavily optimized C++ code (-O3) runs in just 11.5 seconds, 4x faster than python code. Still, the difference was not an order of magnitude. So to me, the python code was fast enough (in the article, Fabien also tests multithreading and even CUDA, but I was not going to use CUDA in my tiny pet project).
Attempt #2 - Fixing bugs and minor changes
Now, that I had the code working, I had to make it work correctly.
- First, I have played around with magical constants in functions to understand how changing them affects the results. This helped me better understand what these values are responsible for. In the process, I fixed the mirroring problem and moved the floor to the bottom.
- I couldn’t find out why the image was dark (I thought my “trick” of reducing the number of rays from 64 to 8 also reduced the amount of light coming to the screen, but this was not the case). The picture remained too dark, and so did the shadows.
Frustrated by constant bug fixing, I also implemented some new features to have fun. I changed three things:
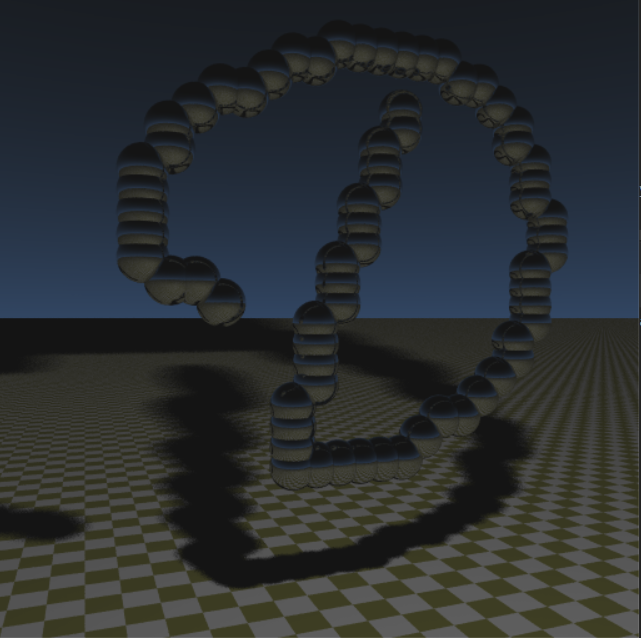
- I replaced the pattern of the balls, as Fabien did, to represent my initials, a handwritten letter D.
- I also changed the sky colour to a more natural blue.
- Last, I altered the floor pattern colour and size.
This was the result:

Attempt #3 - Animation
Edit: You can now read part 2 describing the animation!
At that stage, I made the renderer work in python (except for darkness). It also ran fast, and I could introduce minor changes in the code. But I was still eager to test whether I understood the code correctly.
To prove to myself that I really understood how the code works, I wanted to make something completely new. And since my python code ran quite fast, I have decided to grant the python renderer the power to animate the “business card”:

Describing the animation would require me to introduce some trigonometry. Also, I want to give proper respect to the final code and discuss it in detail. So I will stop here and describe the animation and the resulting code in a separate part 2.
Conclusions
- turns out it can be easy to port C++ code to python (if it is small and well-understood),
- the resulting python code can be fast,
- and numba is a great package to achieve C-speed with python code,
- random code on the internet sometimes does what you expect it to do =)
- a blog post from 2013 managed to inspire me to write something in 2021.
Appendix: recap of raycasting
The C++ code we are discussing implements the idea of raycasting to create an image on the screen.
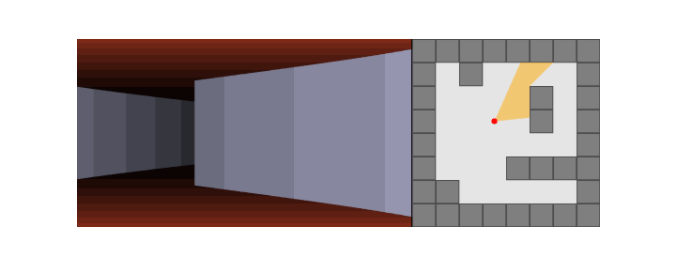
Raycasting, briefly, is a method to create a nice 2D picture that would show what somebody’s avatar would see in a virtual 3D world. First, we create a virtual 2D screen, full of pixels, in front of our avatar’s virtual “eye”. It will be the screen that we show to the user. For each pixel on the screen, we then cast a straight ray from the “eye” through the “screen” into the real world. And we see where the ray hits the real-world objects.
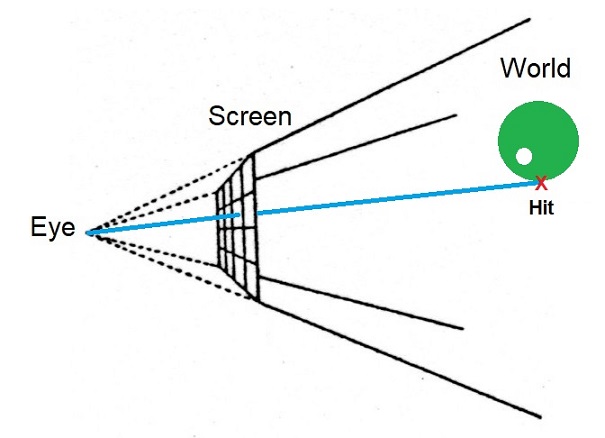
Usually, the ray either hits a sky (or ceiling) or a floor with no obstacles. Sometimes though, the ray hits an object (a sphere, for example). In any case, we check what was hit and at which coordinate, find the colour of this coordinate, and render a pixel of this colour back onto the screen. Once all the rays are processed, the complete picture is built:

Read this article, if you want to learn more about the method.
Appendix: side-by-side code comparison
Here is how C++ code transformed into python code in my hands.
I invite everyone to read the original post. Here I only provide a brief summary of how the C++ code works and then will let you draw the parallels between the two languages. The “business card” code starts with helpers and then implements four blocks of code.
Helpers
The code imports helper libraries and defines a helper class the provides the vector operations.
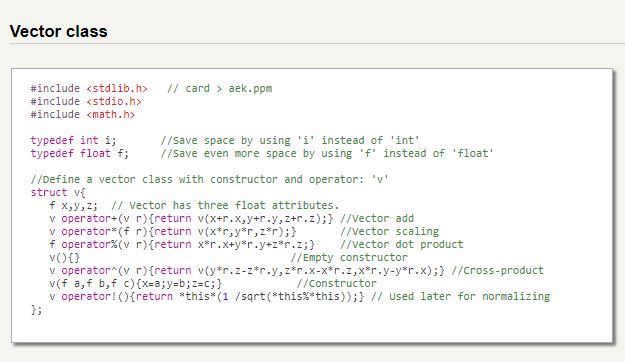
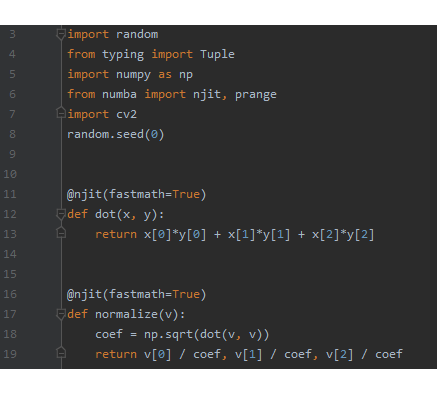
For the python version, I dropped the vector class and instead replaced it with tuples. Everywhere in the code, the C++ classes were changed to tuples, which also meant that attribute access changed from V.x, V.y, V.z into V[0], V[1], V[2].
Description of the world
This part tells the rest of the code where the spheres are located (the floor and the sky are hardcoded in other parts of the code).
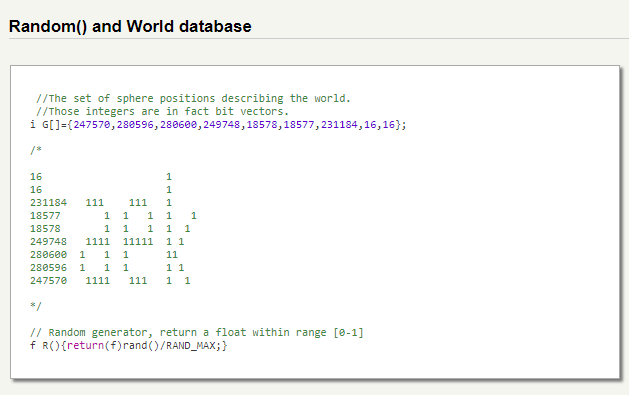

numpy provides a random number generator, so compared to C++ code, I skipped implementing our own random generator within.
The rest of the python code basically creates a binary 2D array, identical to the one used in C++.
Tracer
“Tracer” is the code that checks (traces) where the ray hits the real world: does it go into the sky, hits the floor, or hits the sphere? And at which coordinates did the hit happen? To find the answer, the Tracer uses the “Description of the world” and its own knowledge of where the floor and the sky are.
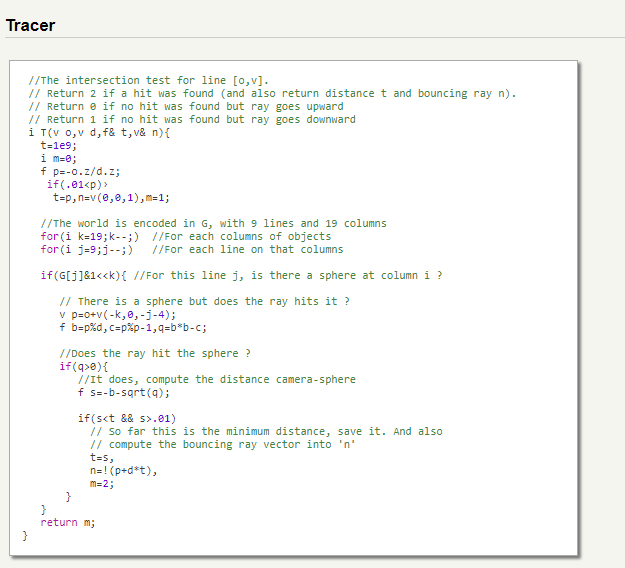
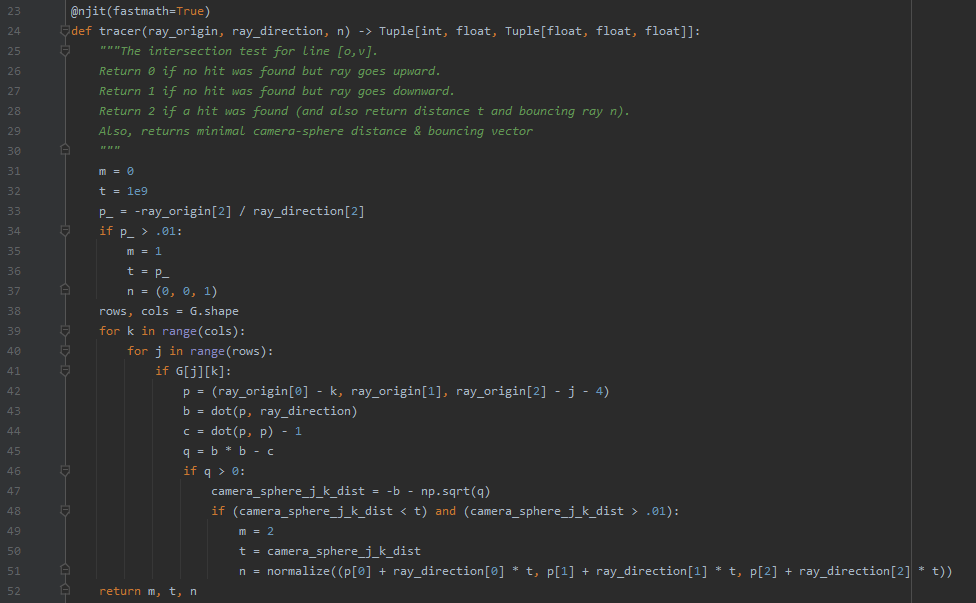
I renamed the variables to make more sense in the cases where I myself understood their meaning.
Sampler
“Sampler” is a code that finds (samples) the colour of the object hit by the ray. The Sampler uses the Tracer to see where the ray goes:
- If the ray goes to the sky, the Sampler defines the colour of the sky, adding a nice gradient on the horizon,
- If the ray hits the floor, the Sampler defines the colour of the floor tile using the coordinates of the hit,
- If the ray hits a sphere, the reflection is created — the Sampler bounces the ray from the location where the sphere was hit, and the tracing of the bounced ray is used (and if the reflected ray hits another sphere, the Sampler keeps bouncing the ray again and again, until the ray eventually hits either the floor or the sky).
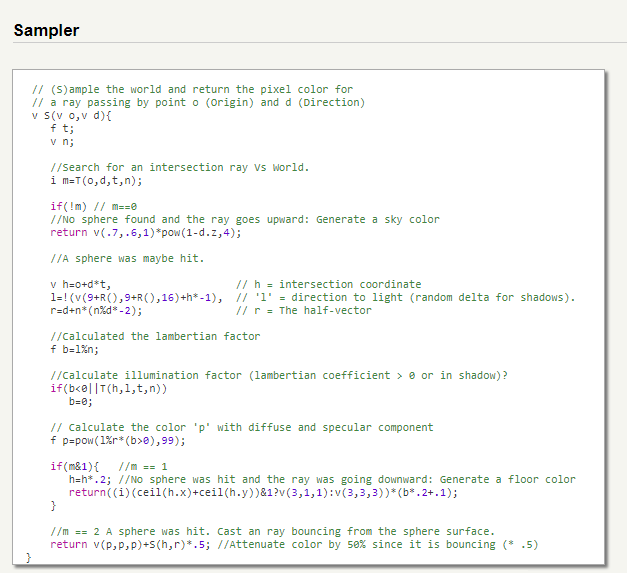
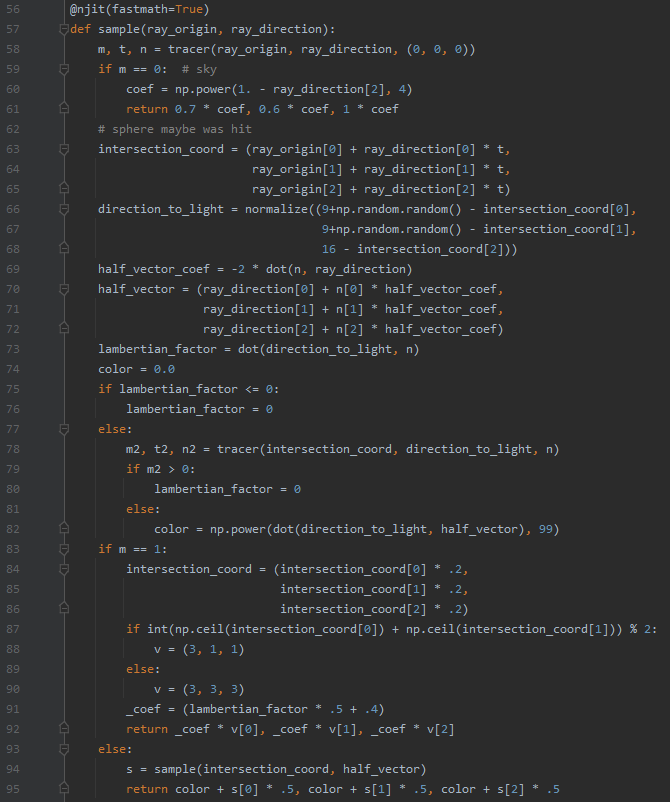
I unfolded the hard-to-grasp conditional ternary operators into the “if-else” statements (which also made the code way longer).
Main code
“Main” method code calls the Sampler for each pixel. It also blurs the image in the distance and creates soft shadows by calling Sampler in a smart, stochastic manner.
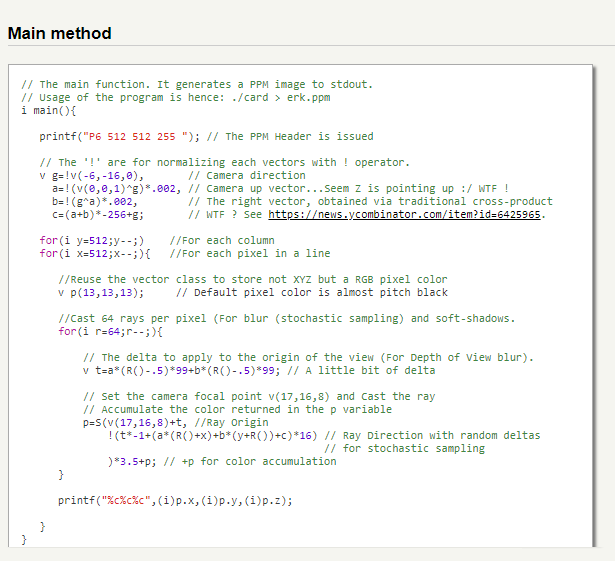
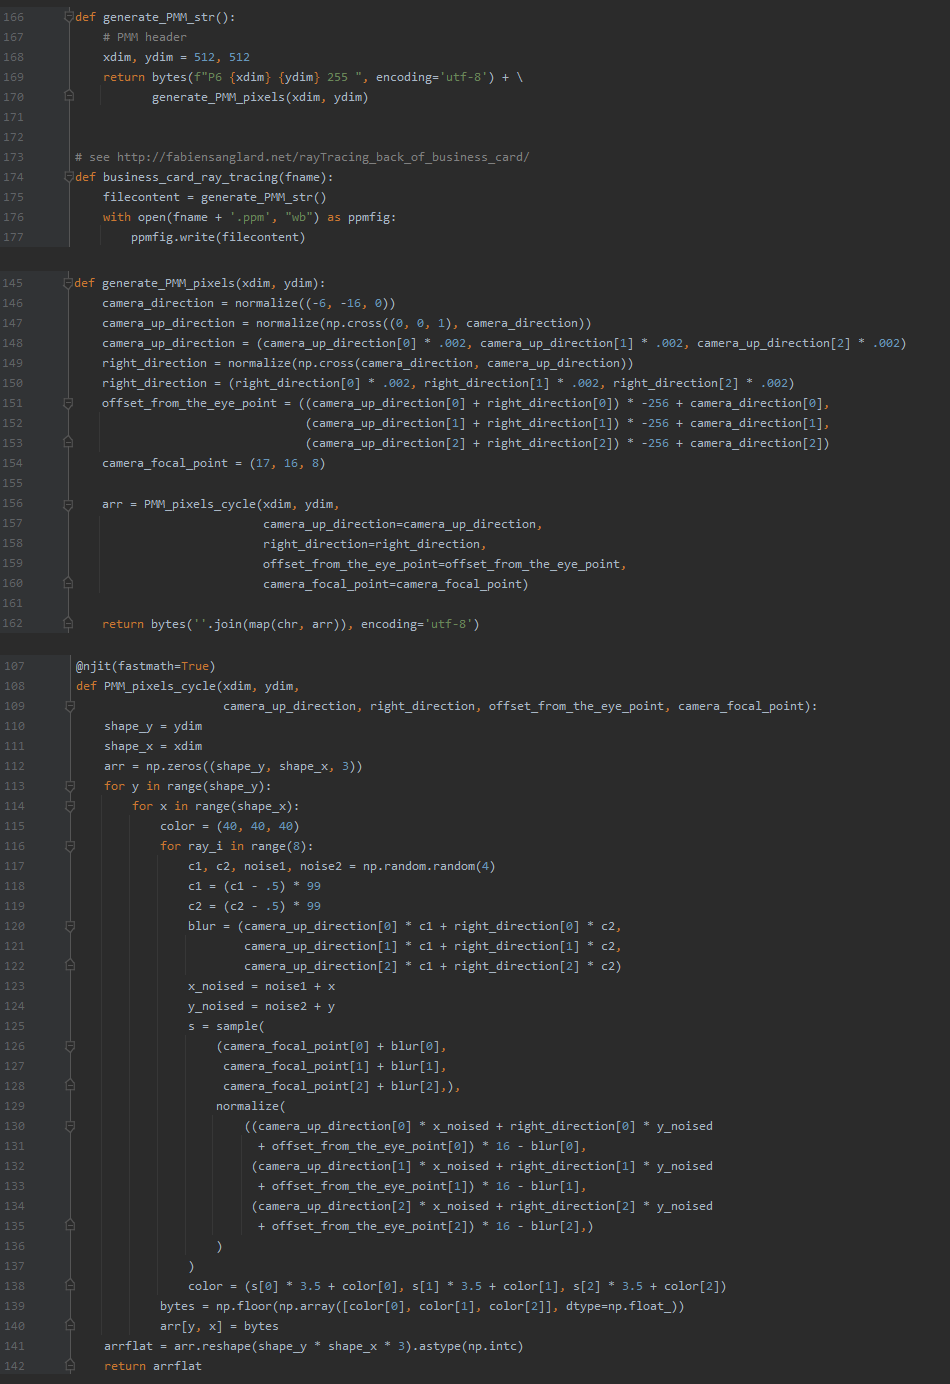
Because I unfolded vector operations, the Main code became much longer. Moreover, my code also saves the image itself to make it easier to use.